

How to Safely Trim Your Pet's Nails at Home
As pet owners, we want nothing but the best for our furry friends. From providing them with nutritious meals to showering them with endless love and attention, we do it all! But one thing that often gets overlooked is trimming their nails. Overgrown nails can cause discomfort, pain, and even lead to infections if left unattended. While visiting a groomer or vet for nail trims is an option, doing it yourself at home can save time and money! However, cutting your pet’s nails isn’t as simple as it seems – knowing how to do it safely is key.
In this blog post, we’ll be sharing some essential tips on how to trim your pet’s nails like a pro from the comfort of your own home! So grab some treats and get ready to become a paw-some nail grooming expert in no time!
The Purpose of Nail Trimming
Trimming your pet’s nails at home is a great way to keep them clean and healthy. You can also avoid potential nail trimming accidents by following these simple steps:
- Check your pet’s nail growth regularly. If their nails are too long or if there is yellow/green inflammation around the base of the nail, it’s time to get them trimmed.
- Choose the right trimmer for your pet’s nails. Trimmers with rounded tips are safer for pets’ nails than those with pointy tips, and those with multiple blade sizes give you more control over the exact length of each nail.
- Hold the trimmer against the pad of your pet’s fingers and trim towards the pinky finger tip, gradually making sure to avoid cutting into any nerves or bones on thatfinger. Repeat on all other fingers (excluding baby fingernails).
- Clippers should be stored according to manufacturer guidelines in order to prevent damage to the blades – either keep them in a plastic case or store them in a dry location away from chlorine, salt water, Strong smells etc.
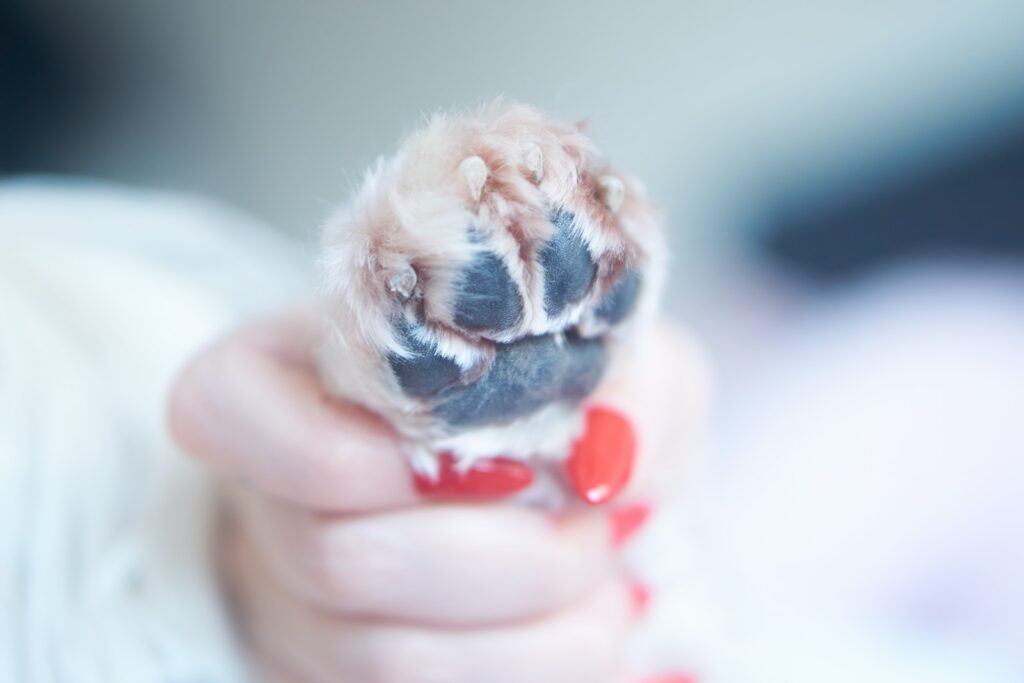
Anatomy of a Pet’s Paw
To properly trim your pet’s nails, you’ll need a clipper and some styptic powder. It’s best to do the job while your pet is distracted or bed-ridden, so they’re less likely to fight back.
Here’s how it works: First place one paw in the clipper’s blade so that the nail is facing away from the blade. Fit the blade of the clipper around the nail, making sure not to go too deep into the paw. Hold down the Paw Clipper and use a even pressure along the edge of the blade to cut away any wet or excess nail growth. Do not pull on the nail – simply let go and it will sever itself cleanly beneath your hand. Repeat on opposite side.
Styptic powder should always be nearby when trimming nails as it can help stop bleeding and pain during nail clipping. Apply a small amount to your fingertips and gently scrub around each end of each clipped nail with a circular motion until polish is off. Then brush off any dirt or debris that may have accumulated on top of the styptic powder and set nails into desired shape using file or emery board, being careful not to over-trim.
Types of Nails
There are a few different types of nails, each with its own specific care instructions. Here’s a guide to safely trimming your pet’s nails at home:
- Clipper type nails : This is the most common type of nail, and usually requires no extra preparation. To cut these nails, just clip the tip and keep clipping until the nail is flush with the surface.
- Paw hammer : This type of nail is made up of two parts: a head and a foot. To trim them, use a paw hammer to gently shatter the foot part so that it can be easily removed. Then use a clipper to clip the head off cleanly.
- Thin claw type : These nails are very thin and can be difficult to cut without damaging them. Before starting, soak the nails in water for at least 30 minutes so that they softened and became more pliable. Then use a small file or curved blade to smooth any rough edges before clipping.
- Extra-thick claw type : These nails are harder to cut because they have more layers of nail material. Before starting, soak the nails in water for at least 60 minutes so that they softened and became more pliable. Then use an extra-thick claw file to smooth any rough edges before clipping.
Choosing the Correct Clippers for Your Pet
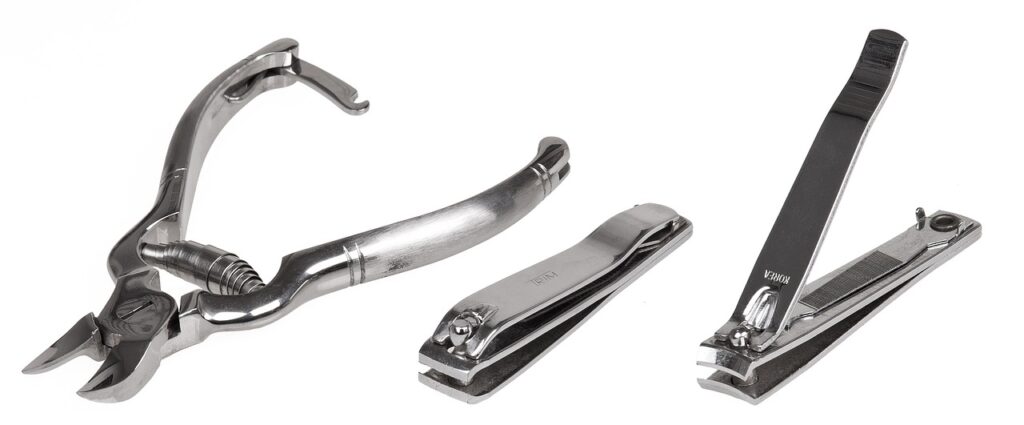
If you are like most pet owners, you probably cut your dog or cat’s nails on a regular basis. There are a few things to keep in mind when choosing the right clippers for your pet. The type of nail that your pet has– especially if it is a breed with odd shaped nails – will affect the blades that you need to use. For example, scissors don’t work well on a cat’s claws because they have curved tips.
The other thing to consider is the length of the nail. If you have a dog with short nails, you will want to choose clippers that have shorter blades. And if your pet’s nails are long, you will need to choose clippers with longer blades.
There are also different types of guillotines (the blade on clippers). Petite and standard breeds usually require Petite-length blades while Danish Shepherds and other large dogs may benefit from Standard-length blades. You can also look for guillotine levers that extend or contract the blade depending on the size of your pet’s nail.
Trimming the Top Margin of the Pet’s Foot
You can safely trim your pet’s nails at home by using a clippers that have a quick-release lever. Hold the pet’s paw with one hand, and use the other hand to pull the nail close to the quick-release lever. Push down on the lever with your thumb while pulling the nail straight away from the claw. Repeat on all four toes.
If the nails are too long, you can file them down to a smooth edge. Make sure the pet is calm and comfortable while you’re doing this—a squirmy pet can cause the nail to become filed too sharply and lead to painful blisters.
Trimming the Side Margin of the Pet’s Foot
If you own a pet, you know that regular nail trimming is important to keep them healthy and happy. Trimming the side margin of your pet’s foot can be done easily at home using common household items. First, sterilize your scissors by boiling them in water for three minutes. Second, make a small cut at the base of your pet’s nails with the sterilized scissors. Make sure to hold the pet’s paw still while doing this so they don’t kick or jerk their foot.
Next, use a straight edge to trim around the nail evenly. Hold down the edge of the nail while you do so to prevent it from splitting or crumbling. Clean up any stray pieces of nail with household bleach or water and dry off your pet’s foot thoroughly before applying bandage or antiseptic cream.
Cleaning and Tidying Up After Your Pet’s Nail trimming Session
After your pet’s nail trimming session is complete, use these tips to help keep your home clean and tidy:
- Dispose of the used nylon nail file and clipper blade in a safe place, such as the trash can.
- Apply a layer of petroleum jelly or a paw-palm moisturizer to the underside of your pet’s nails where they were clipped. This will help protect their nails from environmental damage and promote quick healing.
- Wipe down any surfaces that came into contact with your pet’s nails after clipping them, such as furniture legs, floors, or cabinets.
- Make sure that all cleaning supplies are disposed of properly after using them on your pet’s nails – don’t let them end up in the trash!
Conclusion
Trimming your pet’s nails at home is an important task that should not be taken lightly. By following a few simple precautions, you can ensure that your pet stays safe and healthy while you take care of their nails. First and foremost, always use safety goggles when trimming your pet’s nails. Doing so will protect your eyes from potential injury and help to maintain good nail hygiene. Secondly, always use clippers that are specifically designed for cats or dogs, as these blades are more likely to inflict less pain on the animal than human-grade clippers. Finally, never file nails short – doing so can lead to damage and pain down the road.

6 Comments